The Breukelen Life

The Breukelen Life

Food, Yoga and Travel in Brooklyn

You can scroll the shelf using and keys

Pumpkin Cake with Cream Cheese Frosting

November 17, 2015

FullSizeRender-12

I’ve stepped away from Food52 a bit. I was once obsessive, committed to the beautiful homemakers that submitted their creations for the site – anxious to try many things at home. There were combinations I’ve never heard of that seemed approachable yet new! But lately, meh.

Maybe it’s the move to Jersey that’s changed my mindset. Maybe a “short and stout” tea kettle for $525 seems like a bit out of sorts for what I would think their constituent base to be. Maybe their “Genius” recipe for cauliflower + hot water soup seems…not so “genius” after all? Whatever it is, I’ve moved away and transferred my attentions to the New York Times full blast.

But I went back.

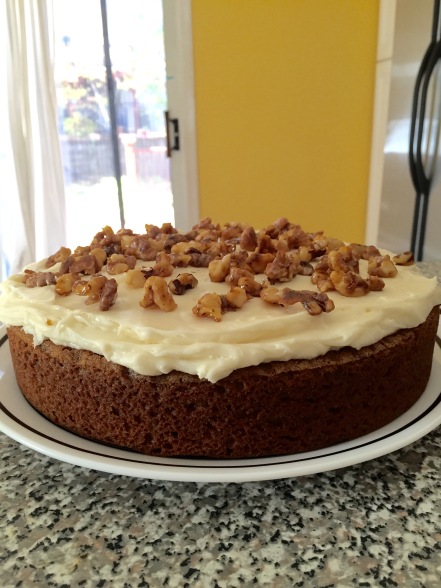
I don’t know why, but I somehow ended up here for the Pumpkin Cake with Cream Cheese Icing and Caramelized Pumpkin seeds. And wow was it worth it.

I was feeling terribly guilty for not cooking for some guests driving along way to see us. We went out and I split the guilt by making dessert. This cake disappeared in about 10 seconds after several helpings from each person. WORTH IT. I only changed one thing which was the obvious walnuts instead of pumpkin seeds.

Enjoy!

FullSizeRender-13

For the cake:

1 2/3 cups all-purpose flour
1 1/2 teaspoons baking powder
1/2 teaspoon baking soda
1 tablespoon plus 1 teaspoon ground cinnamon
1 teaspoon freshly grated nutmeg
1/4 teaspoon ground cloves
1 cup plus 2 tablespoons (9 ounces) pumpkin purée
1 cup vegetable or canola oil
1 1/3 cups sugar
3/4 teaspoon salt
3 large eggs, at room temperature, yolks and whites separated

For the frosting and the caramelized pumpkin seeds:

9 tablespoons butter, divided, at room temperature
8 ounces cream cheese, at room temperature
2 1/2 cups powdered sugar
Pinch of cinnamon
1 tablespoon sugar
1/2 cup pumpkin seeds or whatever nut you have on top (raw or toasted)

FOR THE CAKE

Preheat the oven to 325° F and position a rack in the center. Butter a 9-inch round cake pan, then line the bottom with a circle of parchment paper.

Sift the flour, baking powder, baking soda, cinnamon, nutmeg, and cloves into a bowl and set aside.

Use the whisk attachment of a stand mixer (or just a whisk) to combine the pumpkin, oil, sugar, and salt. With mixer on medium speed, add the egg yolks one at a time, waiting for one yolk to be fully incorporated before adding the next. Scrape down the sides of the bowl.

Whisk in the flour mixture, until just incorporated.

Scrape down the sides of the bowl. Whisk the three egg whites until they are frothy and white. Fold them into the batter using a rubber spatula until they were no longer visible (but be careful not to over mix).

Pour the cake batter into the pan and bake on the center rack in the oven. Begin checking the cake after 40 minutes. Mine took 43 minutes. Remove it when a toothpick or thin knife inserted into the cake comes out clean. Let the cake cool in its pan on a wire rack for at least 20 minutes, or until the cake is pulling away from the pan, before inverting it onto a wire rack.

FOR THE FROSTING

Using the paddle attachment of a stand mixer, beat together 8 tablespoons of the butter and the cream cheese until smooth and creamy.

Gradually add the powdered and beat until the frosting is smooth with no dry traces of sugar.

2 cups. Add a pinch of cinnamon, and beat the frosting until incorporated.

FOR THE PUMPKIN SEEDS

In a small saucepan over medium heat, caramelize a tablespoon of sugar until it is a rich reddish-brown color.

You’ll want to stir the melted parts of the sugar towards the middle while avoiding over-stirring, which can turn the mixture dry and crumbly. Once the sugar is dark and fragrant, add the last tablespoon of butter and stir quickly until it has melted and the sauce is smooth.

Add the pumpkin seeds or nuts and stir until they’re evenly coated in sauce. Transfer the seeds to a plate lined with parchment paper so that they cool and harden.

Frost the cake when it is completely cool. You can do just the top of a fun look or do the whole thing. Let’s get real, both ways are fun.
Ale, Cheddar and Cauliflower Soup

November 10, 2015

FullSizeRender-8

Like most other food bloggers, I am in soup mode full swing and I am not ashamed.

Since I now have plenty of time on my hands, when in the city, I’ve taken to long leisurely walks around the farmers market. It’s taken its turn towards fall with plenty of root vegetables and winter squashes. We have until after Thanksgiving until things get sparse. Let’s make use of this time shall we?

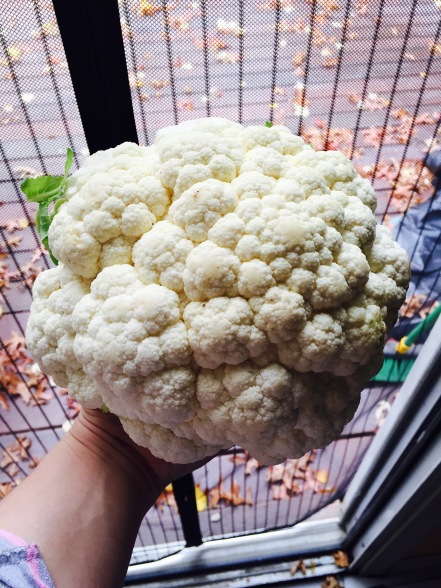
Last week’s stroll brought me to a cauliflower the size of my head. There will be plenty of time for roasting such things when the snow is a foot deep. I was in the mood to be a bit more adventurous. The leaves are falling and the life of summer is still in me. After feeling all the feelings, I was led to this recipe at the New York Times. I love Mark Bitman, lived the VB6 life for a few months before my love of a 10am chocolate snack took over, and generally find his recipes to be spot on.

FullSizeRender-6

I would recommend using the beer listed below and not skipping this step. I wasn’t feeling buying more beer (especially beer that I like to drink on it’s own) and used Yuengling. The soup would benefit from the headiness of the below beers!

As a general rule, I don’t add salt until the very end of cooking. I also keep my stock unsalted. I found this soup needed at least 1/2 tsp of kosher salt at the end but may need more to suit your tastes.

The below is adapted from his original due to a bacon free and cheese light household. Enjoy!

INGREDIENTS
2 tablespoons butter
1 medium onion, chopped
1 medium carrot, chopped
1 medium celery rib, chopped
1 tablespoon minced garlic
1 large cauliflower head, cored and chopped
2 tbsp olive oil
2 12-ounce bottles Brooklyn Local 2, Westmalle Dubbel or another beer in the Belgian dark-abbey-ale style
3 cups vegetable or chicken stock
1 bay leaf
Pinch of cayenne pepper
1/2 tsp smoked paprika
1/2 tsp adobe chili powder
1/2 tsp kosher salt
1/2 tsp black pepper
1 tablespoon mustard
5 ounces sharp cheddar cheese, grated ( can add up to 8 ounces)
1 tablespoon cornstarch (use 2 if increasing the cheese)

FullSizeRender-7
1. Put the butter in a large pot over medium heat. Add the onion, carrot, celery, garlic and pepper and cook, stirring occasionally, until the vegetables begin to soften, about 5-10 minutes.

2. Using a large sheet pan, spread out the cauliflower, toss with olive oil and broil on high for 10-15 minutes until slightly charred. Stir every 5 minutes.

3. Add the cauliflower, beer, stock, bay leaf, cayenne, paprika and adobe chili. Bring to a boil, then adjust the heat so the mixture bubbles steadily; cover and cook until the cauliflower is very tender, 20 to 25 minutes.

4. Remove and discard the bay leaf. Stir in the mustard, and purée the soup with an immersion blender or semi-purée it with a potato masher. Stir in salt and additional pepper if needed.

5. Toss together the cheddar and cornstarch. Add the cheese mixture to the soup a handful at a time, stirring all the while, until it’s well incorporated and the soup is smooth. Serve hot.

Doris Greenspan’s Carrot Cake Extravaganza

November 5, 2015

Screen Shot 2015-11-02 at 5.21.34 PM

This cake is what did me in.

I have spent the last 6 weeks eating like a 15 year old with 34-year-old problems. Last Friday I spied this cake during my usual morning coffee and yogurt (I’m going to eat Halloween candy in an hour) routine and I had to have it. My mouth watered.

I have been telling myself for weeks to get it together. Every centimeter tighter that my yoga pants got, I knew there was a problem that was getting deeper and deeper. Life comes in waves, as does my issues with emotional eating.

But this CAKE. Just look at it!

IMG_1107

Turns out, this cake was just what I needed to take myself over the edge. With every slice, my yoga kicked in and my brain came out of hibernation. It went from “This is delicious!” to “This is delicious but the next time you make a whole cake for two people I’m going to hop out of this skull and slap you.” Awareness is a beautiful thing. Unfortunately it sometimes comes a few days too late.

Personal issues aside, this cake is amazing and will do everything you need it to as evidenced above. I’ve never attempted carrot cake and it turns out that it’s the easiest thing in the world.

I mixed everything by hand sans the icing.

Speaking of… Seems like a lot of powdered sugar right? Well it is. The icing is great but I wanted more of it with not much more sugar. P tested the recipe doubling the cream cheese and he said it was perfection.

Please note:

* IMPORTANT Chill cake in the fridge for 15-20 minutes to set the icing and not jack up your cake presentation.
* The cake will keep at room temperature for 2-3 days. It can also be frozen is wrapped right for up to 2 months but whose will last that long!?
* I buttered and floured the pans liberally. It still stuck. Line with parchment paper if it’s a huge concern. Which – it will be for me next time.
* As you can tell from the pictures, I had to cook on the grill because my oven pooped out on me. Keeping a consistent temp on the grill works!
* For a fancier presentation, do three layers!

IMG_1029

Enjoy!

Ingredients

For the Cake:

2 cups all-purpose flour
2 teaspoons baking powder
2 teaspoons baking soda
2 teaspoons ground cinnamon
¾ teaspoon salt
3 cups grated carrots (you can grate the carrots in a food processor fitted with a shredding blade)
1 cup coarsely chopped walnuts or pecans
1 cup shredded coconut, sweetened or unsweetened
½ cup moist, plump raisins (dark or golden) or dried cranberries
1 ½ cups sugar
1 cup canola or safflower oil
4 large eggs

For the Frosting:

8 ounces cream cheese, at room temperature
1 stick (8 tablespoons) unsalted butter, at room temperature
1 pound (3 3/4 cups) confectioners
1 tablespoon fresh lemon juice or 1/2 teaspoon pure lemon extract
½ cup shredded coconut, optional
 Toasted finely chopped nuts and/or toasted coconut, for topping, optional

FullSizeRender

The Cake

Preheat the oven to 325. Butter and flour two 9-inch round, 2-inch deep cake pans, flour the insides and tap out the excess.

* Whisk together the flour, cinnamon, baking powder, baking soda and salt and set aside. In another bowl, stir together the carrots, chopped nuts, coconut and raisins.
* In a large bowl whisk the sugar and oil together until smooth. Add the eggs one by one and continue to beat until the batter is even smoother. If you are working in a mixer, reduce the speed to low, if you’re working by hand switch to a large rubber spatula, and gently stir in the flour mixture — mix only until the dry ingredients disappear. Just as gently, stir in the chunky ingredients.
* Divide the batter among the baking pans and slide the pans into the oven.
* Bake the cakes for 40 to 50 minutes, rotating the pans top to bottom and front to back at the midway point. The cakes are baked when an inserted knife (or in my case a chopstick!) comes out clean; the cakes will just start to come away from the edges.
* Transfer the pans to cooling racks, cool for 5 minutes, then turn out onto racks to cool to room temperature. (At this point, the cakes can be wrapped airtight and kept at room temperature overnight or frozen for up to 2 months; thaw before frosting.)

The Icing

* Working with a mixer, beat the cream cheese and butter together until smooth and creamy. Gradually add the sugar and continue to beat until the frosting is velvety smooth. Beat in the lemon juice or extract. If you don’t want lemon, use vanilla, it’s fine.
* If you’d like to have coconut in the filling, scoop out about 1/2 of the frosting and stir the coconut into this portion.

Putting it all together
* To frost the cake, place one layer of the cake, right-side up, on a cardboard round or a cake plate. If you’ve added coconut to the frosting, use the coconut frosting to generously cover the first layer.
* Use an offset spatula or a spoon to smooth the frosting all the way to the edges of the layer.
* Top with the second layer, this time placing the cake top-side down. Frost with the remainder of the frosting. Finish the top layer with swirls of frosting. If you want to top the cake with toasted nuts or coconut, sprinkle on these ingredients now, while the frosting is soft.

What’s Better Than Apple Pie?

November 3, 2015

By PitaSushi

As a New Yorker, sometimes you have to do a little under the table trading to get by. In my particular case, I work for a company that has its own garage and occasionally I ask the manager of that garage if I can keep my car there. What do I offer in exchange? The moment the leaves start turning from hunter to vermillion, I will furnish his department with an apple pie.

The thing about making an apple pie is it takes some real love. You have to get that butter nice and cold. You have to peel and cut up all those apples. You have to sprinkle the top with some thick grain sugar. In the end, to do all that work and have no pie for one’s self is a travesty.

So my solution? Slab pie.

File_004

It’s not just a pie, it’s a pie the size of a sheet pan. And what does that mean? That means that not only do you wind up with something similar to a pop tart, something with more crust than filling, you wind up with enough pie to get a parking spot and dessert for a week! And as long as you’re doing all the work to make a pie… why not a slab of it?

Apple Slab Pie

For the crust:
3 ¾ cups all-purpose flour
2 tbsp. sugar
1 ½ tsp salt
3 sticks unsalted butter
¾ cup ice water

To make the crust, start by dicing your butter into ½ inch chunks and putting them in a bowl. Put that bowl in the freezer while you stir together the flour, sugar, and salt. Using a pastry blender or fork, work the butter into the flour until incorporated but you still see some nice butter chunks. Those chunks are what make for flaky heaven so don’t go too far!

Pour in the very cold water and mix until just combined. Dump out onto your counter, and knead one or twice until it forms a ball, then split into two halves making each vaguely rectangular (helps in the next steps) and wrap each in plastic wrap. Refrigerate for at least an hour or up to a few days.

For filling:
4 lbs. cored apples (best are Empire, Macintosh, Granny smith, or a combo)
1 tsp. lemon juice
⅔ cup sugar

3 tbsp. corn starch

1 tsp cinnamon

¼ tsp nutmeg

¼ tsp allspice

¼ tsp salt

Pre-heat your oven to 375°F.

Line the bottom of a 10x15x1-inch baking sheet (jelly roll size) with parchment paper if you’ve got it. If not, just spray with some cooking spray.

File_000

To make filling, cut apples into 1 inch chunks and toss with lemon juice followed by remaining filling ingredients. Stir until nicely coated.

To finish:
1 egg, beaten
¼ cup demerara sugar

Welcome to the tricky part. Pick the half of wrapped dough that’s slightly larger (unless yours are exactly equal because you’re somehow the king Solomon of pastry cutting), and place it on a lightly floured surface. Using a rolling pin and some extra flour as necessary, roll the dough until it’s a rectangle and slightly larger than your baking sheet. It takes some elbow grease and extra flour, rotating as you go to make sure it doesn’t stick, but it will happen. Roll the dough up on your rolling pin and unroll it on the prepared sheet. It should slightly hang over the sides. Now dump all of your filling into the crust and smooth over.

File_001

Replace
Take your second chilled dough and roll this one to about the size of the cookie sheet. If you want to use a ruler like I did, the gods of baking will not frown upon you. Using the rolling pin again, transfer this dough over the filling. Now take your slightly overhung bottom crust and roll up and over the top crust pinching to seal as you go along. If you want to crimp, power to you, but I was exhausted by this point.

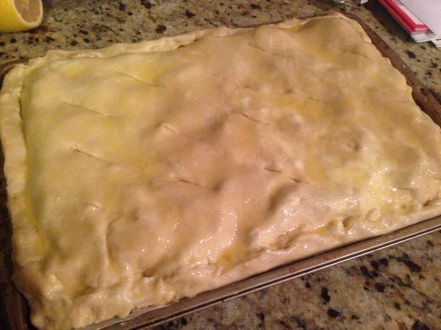
To finish, brush the entire top with the beaten egg and sprinkle with the sugar. This will give it a nice, golden, crunchy sugar top that will make everyone go insane. Cut slits all over the top of the pie so it doesn’t explode (learned the hard way) and place in the oven for 40-45 minutes until golden brown.

File_003

Allow to cool and then slice into two pieces. Pass one under the table to your parking helper and keep the rest on your counter to enjoy!

Sutra 1.4

August 22, 2014

Sutra 1.4 Tada drastuh svarupe’vasthanam

Tada=then; drastuh= the Seer; sva = own; rupe=in (Itself)color, in (itself) nature; avasthanam = abides.

Translation: Then the Seer (Self) abides in Its own nature.

Everyday human translation: Sometimes, after everything, that shit (Sutra 1, 1.2, 1.3) does not work and we think what we want to think. The vrittis, the mental modifications take over and we identify with them. We cannot be our true selves.

This sutra very quickly lets us realize that we let our mind easily control us and that it is very important for us to gain control.

So what then?

The idea is to let go of those ever changing, constantly fluctuating thoughts. The idea is to calm the mind. Why? Because behind a calm mind, we are all the same.

This idea is hard for me to grasp. If we are not what we are thinking – what makes up our being? If we cannot identify with what are we are – I am a woman, I like to cook – who are we? If our thoughts are not a basis for who we are instinctually, then WHO ARE WE?

That’s where I have to let go of that thought. I think back to the first three sutras and remember that our thoughts change constantly. How can we base who we are on something that is always altering? We cannot. And once we let go. Once we all let go – what do we have?

Unity.

“We will have happy and harmonious lives. Only then can we love our neighbors as our own Self. Otherwise, how is it possible?…That’s why yoga is based on self-reformation, self-control and self adjustment. When this reformation is accomplished we will see a new world, a harmonious and happy world.”

If that’s not reason enough to keep a clear mind, I don’t know what is.

Happy Friday all.

Pizza time!

August 20, 2014

20140817_151912

I’m trying really hard to win at summer right now. With most of July spent recovering from my training, summer has fled by. I’m trying to make up for some serious lost time. There has been lounging – combined with a few serious summertime naps. There are long walks to the train. Long mid-day walks around the park. Windows – open. Beach time – yes. Ice cream? Most definitely. Always.

And cooking! What have I been cooking you ask? Well mainly tomatoes, corn and zucchini all at once or separately and into every meal that I can. Oh and let’s not forget these little guys that I picked up last week. They were a fun cucumber like addition even though J kept calling them lizard eggs.

Sanditas!

Sanditas!

__________________________________________________________________________

This weekend I dived into my Jim Lahey and Rick Flaste’s “Pizza” cookbook for a bit of inspiration. I’ve taken to actually reading my cookbooks lately. Like, not just the recipes but the beginning part too. How often does that happen!?

I particularly like the section on “A Reverence for Ingredients.” He lays out specifically what we should be looking for in the most basic ingredients needed to make a great pie. Pizza is simple and what we put on it should be top notch to make the flavors shine through.

Below are the nuts and bolts.

Flour – Simple all purpose or bread flour. None of that fancy pizza dough crap. Keep it real.

Olive oil – Don’t be cheap. The best and freshest from the first press is necessary – not the leftovers from the first press. It should be smooth and buttery with a peppery finish. He says that Chile has the highest standards for production even though Italy has the richest culture for it. France and Spain are also nice. I keep a good stock from California Olive Ranch on hand always. After a particular informative wait at South Brooklyn Pizza I’ve started finishing all my pies with a good swirl of olive oil, a dose of Parmesan and a sprinkle of basil. It will change your life.

Cheese – It’s the main part of the pie so why skimp? The mozzarella should be fresh. Specifically he says “it should be creamy, slightly sour, and very wet with a fleshy texture.” Done and Done. Why would we do other wise?

Tomatoes Fresh is best – Same as the olive oil. Sensing a trend? When using canned, go for something out of Naples. Tomatoes from the base of Mount Vesuvius are particular popular touting that the rich volcanic soil does wonders for the taste.

San Marzano tomatoes are the most easily accessible tomatoes out of Mount Vesuvius and run about $3 a can in Brooklyn. If you have a chance to go to Eataly check out their extensive collection and splurge. I cracked open my final can from a recent semi regretful trip, 28oz. I got two pies from it and am making sauce tomorrow for at least two meals. It will be well worth it.

Have I mentioned I really love this book? Buy here. It’s so nice to have around the house.
__________________________________________________________________________

I ended up making two pies this week. I went a little nuts and made all white pizza dough – living on the edge I know. Trust me it’s a big, delicious departure from my usual half whole-wheat crust. And in my cast iron skillet? Holy delicious. You can see the basic recipe here. Play around with how much whole wheat you use. I’m not sure the taste is worth the health benefits.

Before I got started I sliced a bunch of mini zucchinis with my mandolin and salted in a colander to release the moisture.Let sit at least 20 minutes.

For the sauce, I took Lahey’s advice and crushed the tomatoes (28oz can) with my hands, mixing in two tablespoon of olive oil and ¼ tsp of fine sea salt.

I used fresh mozzarella and ricotta from Russo’s. I topped the cheese and sauce with fresh cut baby heirloom tomatoes and some zucchinis. I baked for 25 minutes, swirled with olive oil and Parmesan. Then I proceeded to burn my tongue because I couldn’t wait to eat.

The second pie, I repeated but added fresh corn because, why not? I have yet to taste this version but seeing as how J almost finished it by himself in 2 days, I’m not worried about it being bad.

How do you make your pizza?

Sutra 1.3

August 8, 2014

DSC_1329
Sutra 1.3Tada drashtuh svarupe vasthanam

TranslationThen the Seer (Self) abides in Its own form

If you remember, Sutra 1.2 stated “The restraint of the modifications of the mind stuff is Yoga.” Sutra 1.3 builds on that saying it is only when we control the fluctuations of mind that we can truly see ourselves. The Seer – that’s us! That’s me, you, and you and you. So only when we quiet the mind from all the chatter are we able to see ourselves for who we truly are.

This sutra is simple enough to understand but difficult to put into reality because more often than not, what we are considering to be our true selves is often just a reflection of what we are observing at the moment. And every moment is different. Our feelings change from second to second sometimes. I know mine do! So how can we say with complete confidence that what we are feeling at any given second is who we truly and absolutely are?

We can’t.

“The true you is always the same, but you appear to be distorted or mixed up with the mind. By making the mind clean and pure…you appear to have gone back to your original state.”

The true you!

While I haven’t gotten close to working this out, I am in the baby steps. It’s particular helpful in relationships and work situations. To be able to say to yourself – Wait a minute and step back from a situation that’s frustration or weird is truly a great thing. Instead of jumping to conclusions that are directly related to me ME ME, I am now able to step see multiple sides of a problem and come to a more realistic end.

How do you clear your mind?

Roasted Tomato Quiche with Goat Cheese

August 6, 2014

DSC_0836

Last week I picked up the first of many containers of tomatoes at the farmers market. These were pretty little puppies, shaped like a fat tear drop and had the word “candy” in the name. No, I cannot remember where I got them.

My relationship with tomatoes has always been long, drawn out and shaky. Up until about 4 or 5 years ago, I never ate them except sparingly on bruschetta doused heavily in olive oil and garlic. On their own? Forget it. Slowly and gently the snob in me started to experiment with heirloom tomatoes, the big fat ones that I historically shunned but grew interested in because… media. I wouldn’t eat them on their own but they grew in numbers on my plates mixed in with pasta and rice dishes. I still won’t eat them on their own but their domination is clear this summer as I threw the first of this batch in a tomato and cucumber salad.

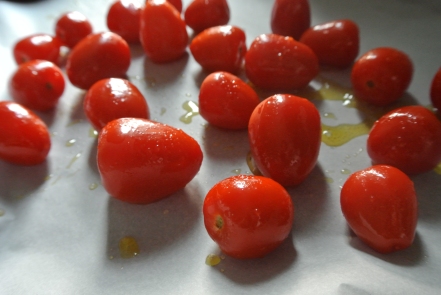
And now, quiche! Quiche with gently roasted tomatoes in the oven with olive oil and flaky sea salt, this thing is a beauty. I started with this recipe from TheKitchn but as per usual, I started mixing up several recipes in my head at once.

DSC_0838

I used all my tomatoes because why not? I ended up with about 1 ½ cups extra custard so I put some tomatoes aside and made two mini crustless quiches in my Wreck jars.

Enjoy! (And in case you are curious, there are 8 servings – 7 Weight watchers points/serving, 4 pts w/o the crust)

DSC_0842

1 pie crust. (Use your favorite recipe or your favorite grocery store to pick one up at. I prefer Union Market but went with Fairway this time.)
11 ounces cherry tomatoes
2 teaspoons olive oil
1/4 teaspoon salt
6 large eggs
1 1/2 cup whole milk
1/2 cup heavy cream
½ cup nonfat milk
3/4 teaspoon salt
1/4 cup Parmesan cheese, finely grated
1/2 cup goat cheese

Preheat oven to 375. Pre-bake crust for 5 minutes.

In a large bowl whisk together the eggs, milk, cream and 3/4 teaspoon salt until frothy.

Mix in half of the cheeses. Scatter half the tomatoes and half the goat cheese, crumbled, over the bottom of the crust. Pour in the egg custard. Scatter the remaining tomatoes and crumble the remaining goat cheese around the custard. Scatter the remaining Parmesan cheese evenly over the top.

Bake for 45-50 minutes, or until the center is set, but still a little jiggly. (I forgot about mine and checked right at 50 minutes when the buzzer went off. It was perfection.)
If the crust starts to brown too much during baking, wrap foil around the edges of the pan to protect it.

Let quiche cool for at least 15 minutes before serving.

Summer Sunday Funday

July 28, 2014

IMG_0639

I wish I could say I’ve been a source of inspiration in the kitchen but as of late, things have been a little bit dry. Between navigating my busy work season along with yoga teacher training, I am only now starting to get back on my feet. The last three weekends were spent completely comatose.

This weekend wasn’t much different. I rallied a bit but not too far. I ventured into some roasted tofu, brown rice and lemon grass. It proved worthy. I attempted another Bikram visit. That proved….difficult. But really, the highlight of the weekend was not spent in the house, but walking, ice creaming and beaching. It is summer after all!

J put it best as we were lounging on the rooftop of the new Ample hills in Gowanus. “Why would we pay so much to live here if we’re not going to go out and do the stuff that makes living here to expensive?”

Amen to that.

I never give myself enough credit. Because I would be lying to you and my weight watchers counter if I didn’t tell you that some cookies did get made yesterday. Sunday seemed to be the summer day that never ended and I will forever be happy for it this week. We rose early – grabbing bagels for a beach time breakfast. The bathroom got cleaned. Cookies and pizza got made. Trash and recycling- taken out. Floor – swiffered. Oh and the entire season 2 of Orange is the New Black? Completed along side two hours of restorative yoga poses. Yes, I slept deliciously.

DSC_0828

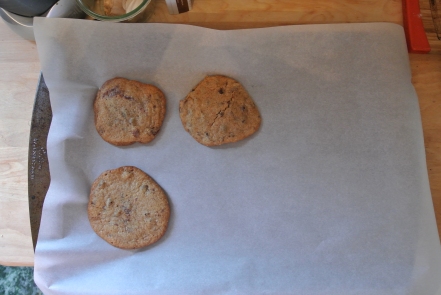
Cookies? I did mention cookies didn’t I? A midst the afternoon naptime, my Martha Stewart “Cookies” book caught my eye. I wanted something warm and simple to go with ice cream so I went with the soft and chewy chocolate chip cookie. It’s really the best and requires so little ingredients that it’s a no brainer.

The recipe calls for 1 heaping tablespoon of dough per cookie to make 3-dozen. I used one heaping and one level combined to make one good-sized cookie and got 18 cookies out of the batch.

Enjoy!

DSC_0832

2 ¼ cup all purpose flour
½ teaspoon baking soda
1 cup (2 sticks of butter)
½ cup granulated sugar
1 cup light brown sugar – packed
1 tsp coarse salt
2 tsp vanilla extract
2 large eggs
2 cups semi-sweet or milk chocolate chips – a combo is good too

1. Preheat oven to 350.
2. Whisk flour and baking soda together in a bowl.
3. Beat sugars and butter together until light and fluffy – about 2 minutes.
4. Add salt, vanilla and eggs – mix until well blended – about 1 minute.
5. Mix in flour mixture
6. Mix in chocolate.
7. Drop your cookie dough measurement of choice (1 heaping tbsp?) onto baking sheets lined with parchment paper spacing a few inches apart. Bake cookies rotating half way through until edges are still brown but centers are still soft. 10-12 minutes. Let cool on cookie sheets for 2 minutes. Transfer to wire wracks to cool completely. Can be stored between sheets of parchment in a Tupperware container for up to 1 week.

Sutra 1.2

July 25, 2014

DSC_0687

Sutra 1.2Yogas cittas vritti nirodhah

TranslatedThe restraint of the modifications of the mind-stuff is Yoga.

In Sutra 1.2 Pantajali tells us the definition of the yoga and the goal. Yoga is the quieting of the mind – it is the calming of the fluctuations of the mind stuff. If our mind was a lake – sometimes it has so many ripples it looks like a thousand rocks were just throw into it. Now imagine that lake clear, calm, peaceful with no ripples – that is your brain on yoga ☺ Sorry I had too.

It is said that if we master this sutra – we are able to master yoga.

Within the goals of yoga, changing the outside world is not one of them. It is not the world, or the things or the people within it that liberate or bind us. It is only our attitudes towards them that constrict us. So, to change our world, we must change our thoughts. If we are able to control our mind…our possibilities are endless and nothing will be able to bind us.

“The entire world is based on your thoughts and mental attitude. The entire world is your projections. Your values may change within a fraction of a second…. If we remember that, we won’t put so much stress on outward things.”

So that’s great and all, but how do I control my mind? Well a good start is the breath. You have certainly noticed at some point or another that when you work on deepening your breath or slowing it down, you immediately calm down? You are focusing on you, your breath and nothing else. Yoga is built on this. When you start to get stressed out on the mat, focus on your breath. You will begin to see things clearer – the ripples will smoothen.

Bit by bit we work on this, on the mat. The nice thing about the sutras is that is shows us that what happens on the mat, also happens off of it. It is a constant, continual practice. Eventually we will be able to control our thoughts so matter where we move.

This is especially a nice thought in New York where just walking out the front door is a constant battle. It is my hope that one day I walk out the door and feel a clear, blue lake with bright skies instead of being assaulted by the smell of garbage and a searing humidity. Everyday is a practice…

What do you do to help clear your mind?